Organize channels in Sony KD48A9BU
Edit programmes on Sony KD48A9BU
Organize channels from Sony KD48A9BU settings
If you have just tuned in to the channels on a Sony KD48A9BU television or you tuned them in for a long time and they are out of order, or you want to eliminate any of them, we will show you how to organize and eliminate cable, satellite or DTT channels step by step and with images.
Estimated time: 15 minutes.
You will need:
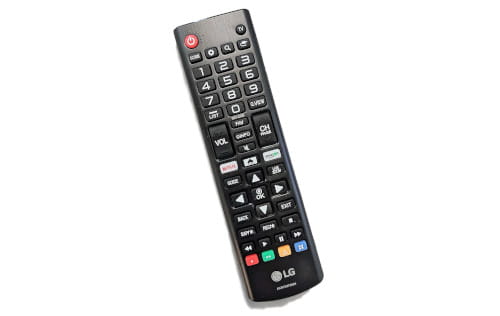
- TV remote
If you don't have a remote you can buy one from this link on Amazon. *
1- First step:
Turn on your Sony KD48A9BU and press the settings button on the remote control, if your remote control does not have this button press the "Home" button, it is the button with the drawing of a house. Once it appears select settings from the TV menu.

2- Second step:
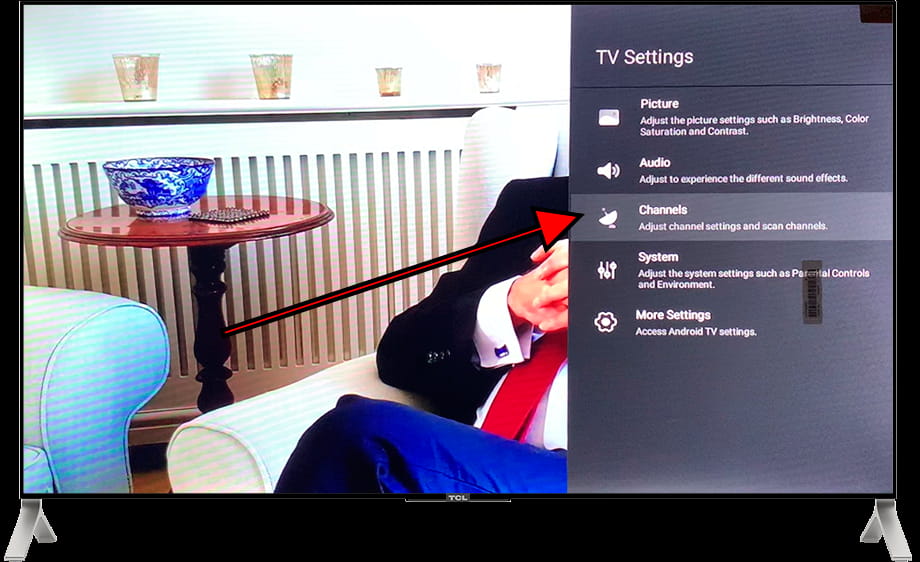
Using the direction buttons on the remote control, scroll down to select the "Channels" section. Press "OK" on the remote control to access the channel settings of the Sony KD48A9BU TV 124.5 cm (49") 4K Ultra HD Smart TV Wi-Fi Black.
3- Third step:
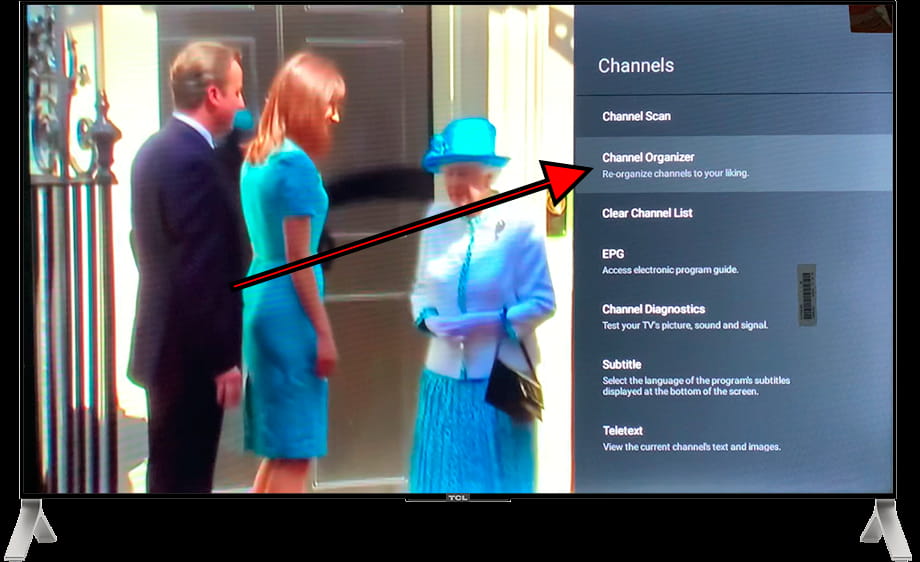
The second section that should appear is "Channel Organizer", use again the direction button on the remote control to select this section and press "OK" to continue editing the TV channels on the Sony KD48A9BU TV 124.5 cm (49") 4K Ultra HD Smart TV Wi-Fi Black.
4- Four step:
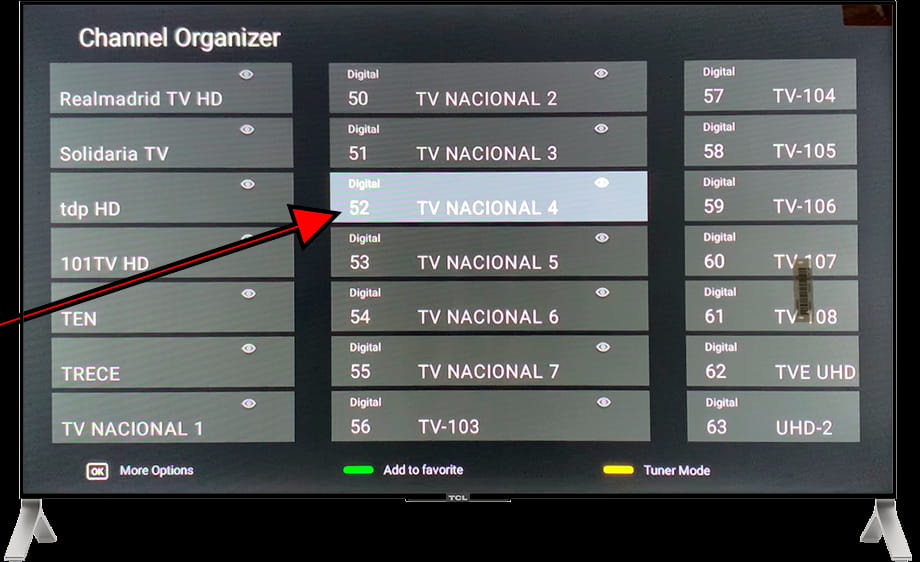
Select the channel you want to move and press the "OK" button on the remote control to open the available options.
5- Fifth step:
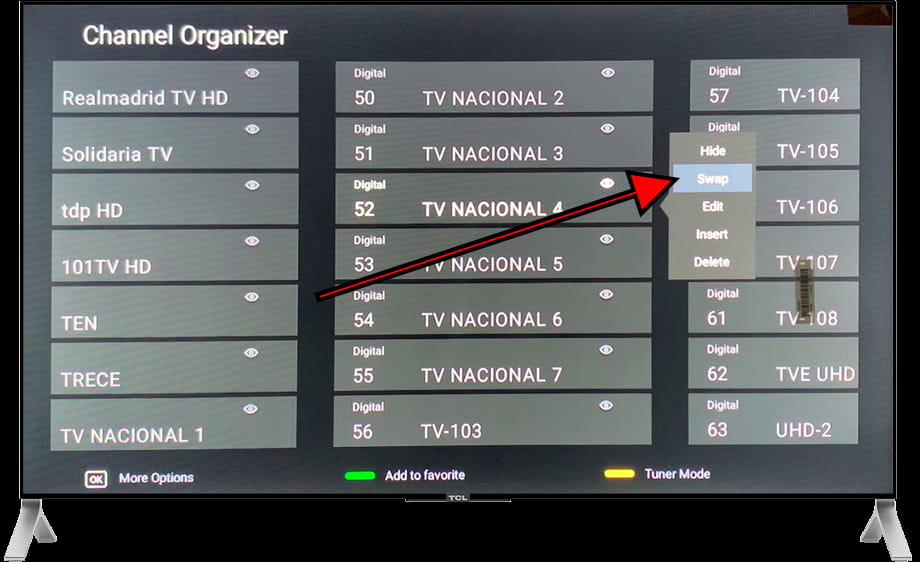
You can move the channel or indicate the number of the position where you want to move it to.
To move the channel click on "Swap" and using the direction buttons on the remote control move to the position where you want to save the channel. Press the OK button on the remote control to confirm the position. Repeat the process for all the channels you want to move on your Sony TV.
6- Sixth step:
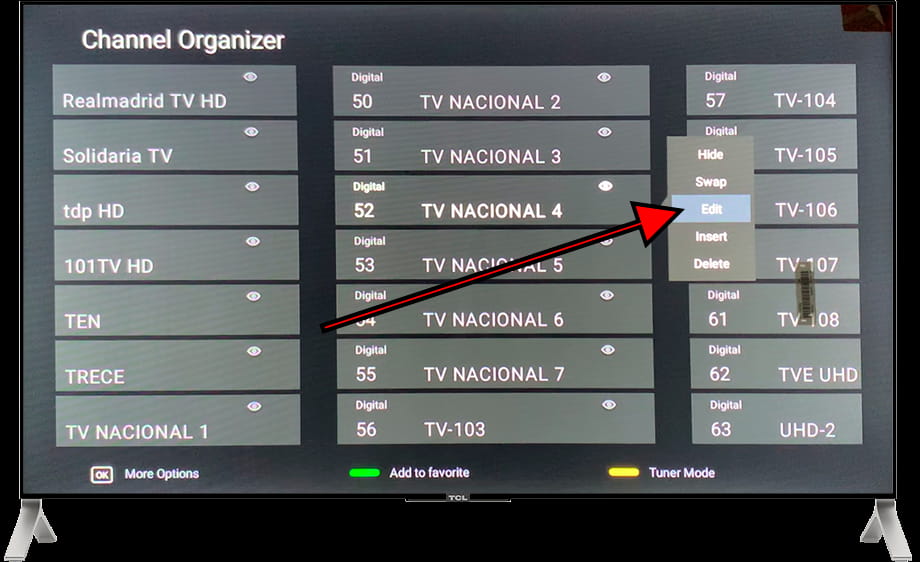
If instead of moving it with the direction buttons on the remote control you want to directly define the channel number, click on “Edit”.
7- Seventh step:
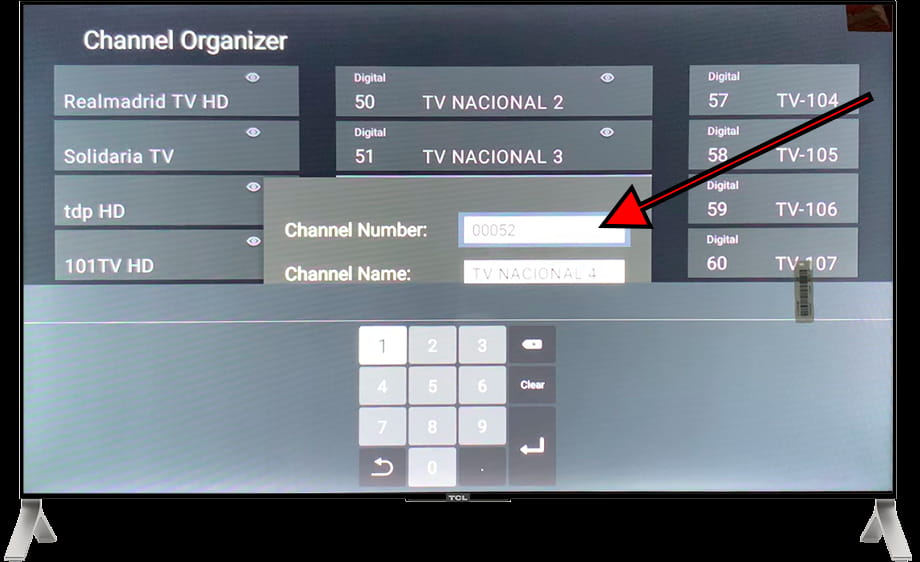
Type the channel number using the keyboard that appears on the Sony KD48A9BU screen, you can also change the channel name if you feel like it. Once you have written the channel number and name, press the back button on the remote control to continue since the window may cover the “OK” button.
8- Eighth step:
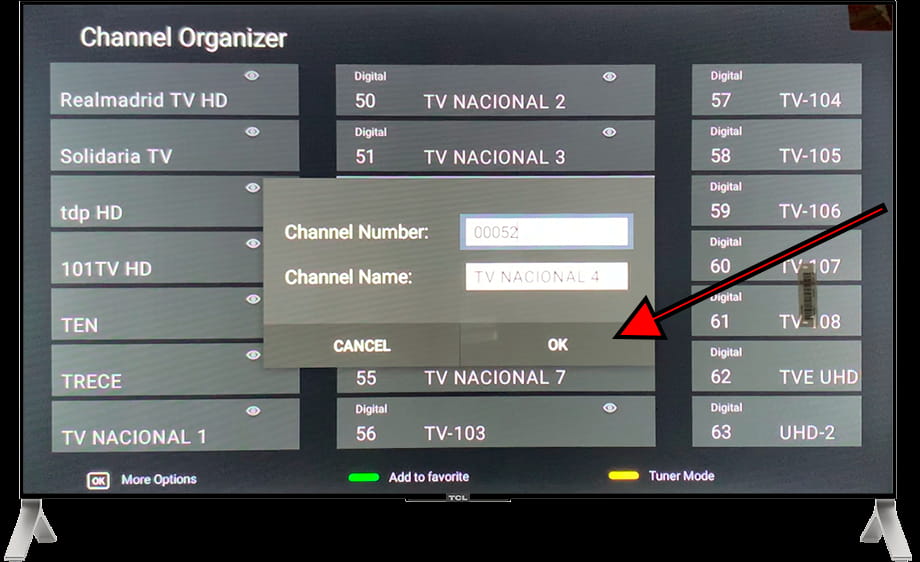
Select “OK” and press the “OK” button on the remote control to finish editing this channel.
9- Eighth step:
When you have finished sorting channels press the "Back" button on the remote control to finalize and save.
Press the back button until you exit the Sony KD48A9BU settings.

Has it been useful?
