Connect to the internet Sony KD49XE8077
How to connect to the internet Sony KD49XE8077
Configure Wi-Fi in Sony KD49XE8077
If you have just bought a new or second-hand Sony KD49XE8077 television or you bought it a long time ago, and you do not remember how to configure the Internet connection via Wi-Fi, we will tell you how to configure the network step by step and with images.
Having internet access on your Sony KD49XE8077 TV is very interesting today, you can have your Android operating system updated, download applications to watch series, movies, videos from social networks, IP television, view your photos and rewind programs television broadcasts that are broadcast live so you don't miss a thing.
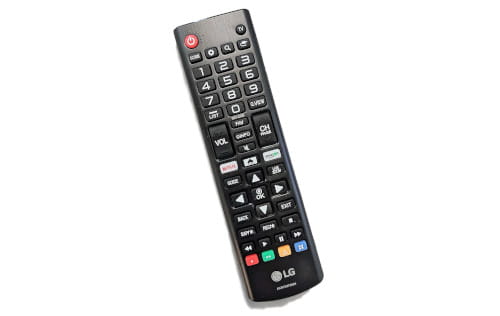
Of course you will need the password of the Wi-Fi network to which you want to connect the TV and the remote control of the TV.
The Sony KD49XE8077 has the following wireless connections:
Miracast: Yes.
Bluetooth: Yes.
Wi-Fi standards: 802.11a,Wi-Fi 5 (802.11ac),802.11b,802.11g,Wi-Fi 4 (802.11n).
Wi-Fi: Y (Wi-Fi TVs ).
Wi-Fi certified: Yes.
Estimated time: 10 minutes.
Table of Contents:
You will need:
- TV remote
If you don't have a remote you can buy one from this link on Amazon. *
- Internet connection
- Wi-Fi network password
1- First step:
To start, open the start menu of your Sony KD49XE8077 124.5 cm (49") 4K Ultra HD Smart TV Wi-Fi Silver TV, to do it on the remote control press the "Home" key, it is the button with the drawing of a house.

2- Second step:
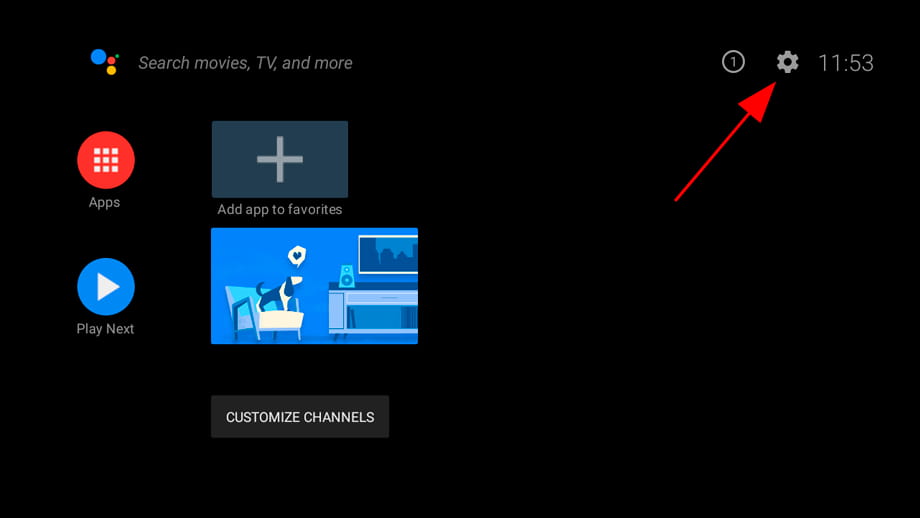
Next, click on the settings icon that is in the upper right part of the KD49XE8077 screen, its icon is the symbol of a gear or cogwheel.
3- Third step:
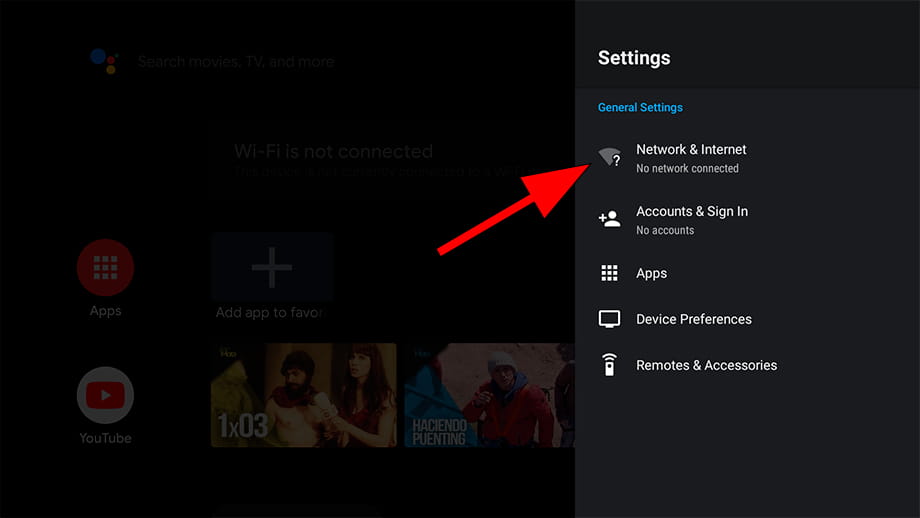
Look for the "Network & Internet" section represented by the icon of a Wi-Fi network.
Press the central button of your Sony KD49XE8077 remote control to access the network settings.
4- Four step:
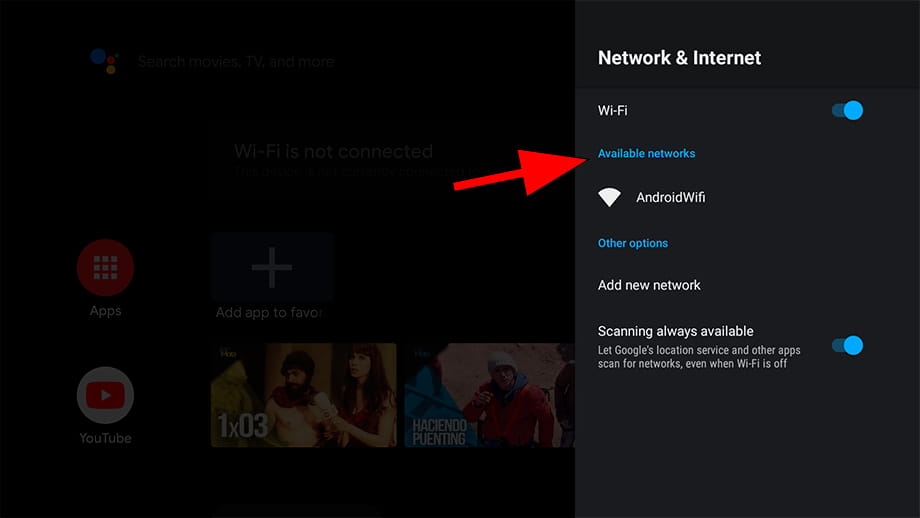
Check that the Wi-Fi connection is activated, if it is not, activate it.
A list of Wi-Fi networks within range of the TV will appear Sony KD49XE8077.
If you recognize your Wi-Fi network, select it and press the central button of the remote control.
If you cannot find it, it may be hidden, click on "Add new network".
5- Fifth step:
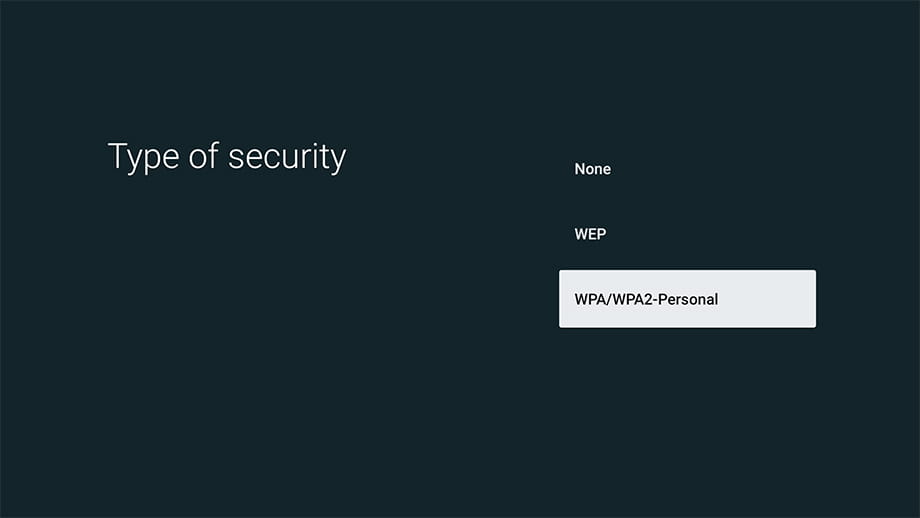
In the next step, you must choose the type of security of the Wi-Fi network to which you are going to connect, in current routers the most advanced and common type of security is "WPA / WPA2-Personal".
6- Sixth step:
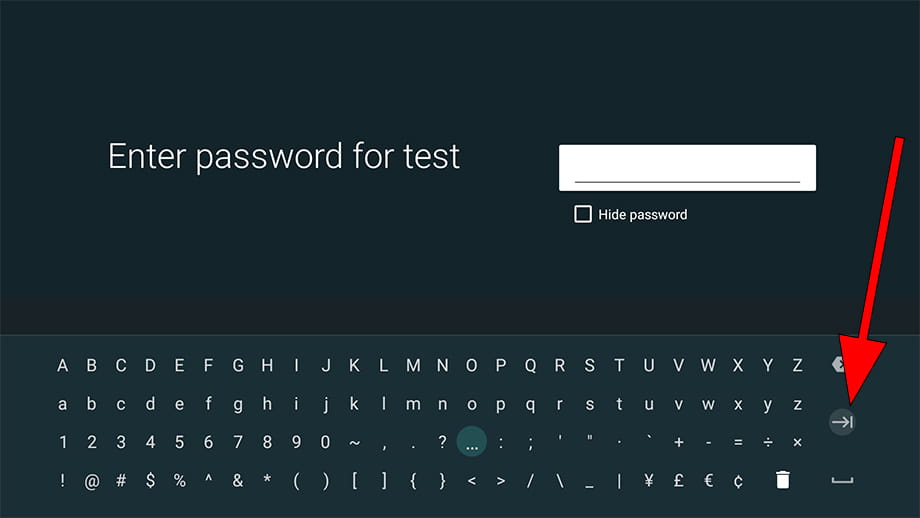
Next, enter the password for the Wi-Fi network that you have previously selected to connect using the keyboard that appears on the screen.
If you don't see the keyboard, hover over the blank space and press the middle button on the remote control.
Use the directional buttons on the remote to navigate through the keyboard and press the center button on the remote to confirm each letter, number or special character.
Once finished, click on the right arrow icon that appears in the central right part of the on-screen keyboard.
7- Seventh step:
If the password entered and the rest of the data are correct, a confirmation message will appear on the screen, click "OK" to finish the Wi-Fi network configuration process and you can start using the internet on our Smart TV Sony KD49XE8077.
